A Photographer’s Guide to Lake Motosuko
Why Photograph Lake Motosuko?
Lake Motosu is world-famous for its vista of Mt. Fuji. If you are like me, you love photographing Mt. Fuji and are looking for the best locations to do so.

Well, look no further than Lake Motosuko. The old Japanese 5,000 Yen note and the new 1,000 yen note include an image of Mt. Fuji based on a photo by Koyo Okada titled “Kohan no Haru.” It is a beautiful image of Fuji-San that can still be seen today thanks to the largely undeveloped nature of the area around the lake.
The area near Lake Motosuko is known as the Five Lakes Region due to the five lakes that border the edge of Mt. Fuji from East to West over the Northern half of the Mountain plain.
This location is definitely worth a visit by any Fuji enthusiast.
How Did I Prepare
We planned our trip on a weekend. I don’t live too far away from the Five Lakes Region so we can drive to the location in less than a day. I thought that if we arrived on a Sunday, it might less busy at an overnight campsite due to Monday being a standard work day in Japan.
Boy, was I wrong. After being here for almost four years, I still forget that if you are doing something in the greater-Tokyo area, there are going to be copious amounts of people. There is always a crowd in Japan.
But crowds aside, I was excited to be getting a new view of Fuji to add to my collection. I knew I wanted to try some astro photography for the first time, so I watched the weather carefully and we got super lucky with two days that showed no clouds in the sky.
That said, it was summer and the sun was blazing. So sun protection is a must at this location.
The Camping Situation
We took a modest camping set up of a rented tent, table, chairs, and some sleeping bags. I realized the moment we pulled in that I had really underprepared for the Japanese camping experience. The local campers had enormous and intricate set ups with awnings, living areas, and sleeping quarters. With the hot sun I had mentioned earlier, we were regretting not having anything to create shade at our site.

When we arrived, we made the mistake of immediately driving down to the lake. Don’t do that. The check in is at the hotel and restaurant at the top of the hill. Stop there first, then head down to set up. There was a big line when we arrived, so be prepared to wait.
We decided to stay at Kouan Camp Ground. The site has a few locations, but we reserved a spot on the Lakeside campground. I expected the campsites to be marked with boundaries for each reservation.
Nope. We were given instructions to set up with our closest piece of equipment or stake no closer than one meter to the next camper. We were on our own finding a spot and it was packed.
We got super lucky to find just enough room at the very end of the beachfront to set up. There are several rows back, but we obviously wanted the experience and view of being on the beach.

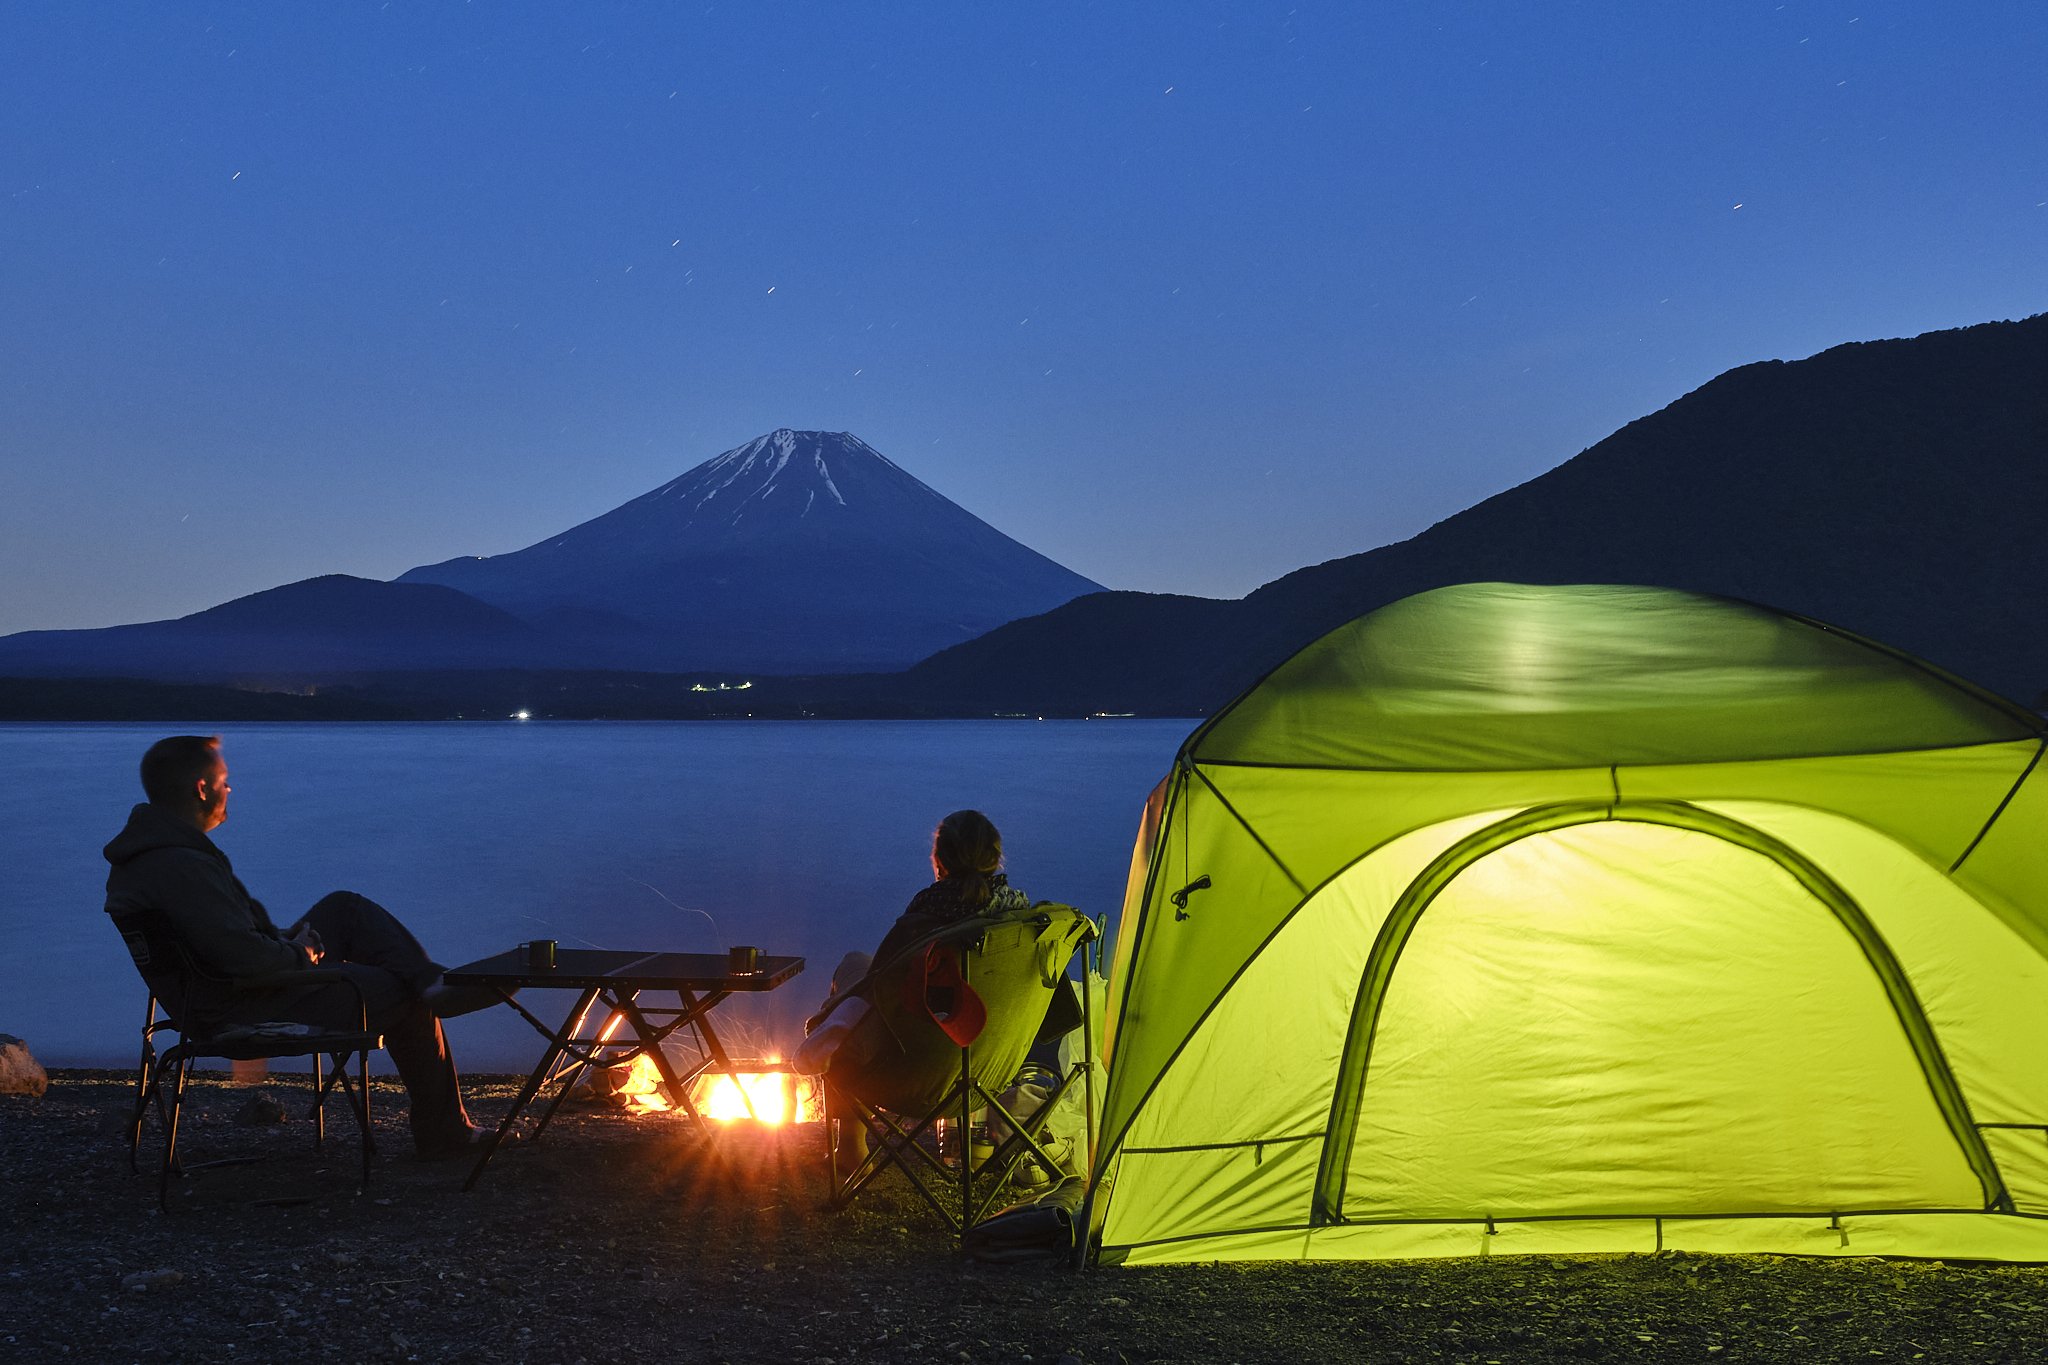
The pictures tell a different story than reality. That site was completely full, but we made it work and it was generally peaceful.
One additional tip about the campsite before I move on to the photos: Take a cot!
Maybe I am just getting old and my back cannot take it anymore, but a foam pad was not enough to protect us from the hard-packed slate on the ground.
What gear did I Take
The primary purpose of this get-away for me was to photograph the night sky over Mt. Fuji with star streaks. This is something I had never done before, so I wasn’t totally sure what I would need.

The Gear I Brought:
My cropped sensor, mirrorless camera
A 16-55mm, F 2.8 (about 24-82mm full-frame equivalent)
A 50-140mm, F 2.8 (about 75-210mm full-frame equivalent)
A few batteries
A really great carbon fiber tripod my wife bought me for Christmas one year - thanks for that!
And that was it.
The Gear I Wish I Had Brought:
An external battery pack — I have one that could have powered my camera on a USB-C Port, but I didn’t think I needed it. I did.
A fixed 35mm lens (50mm full-frame equivalent) — My composition for the star trails was right at this focal length and having this lens would have removed one more variable that can go wrong.
Photographing Star Streaks
To learn how to photograph star streaks I did a little YouTube research before I headed out. As usual there are multiple schools of thought, but it was my first try, so I was going to have to experiment.
I set my camera fully on manual. The color balance was set to 3200 Kelvin. This color balance is usually used for very orange/yellow light such as an incandescent light bulb (do those even exist anymore?). This setting gave my sky a blue-green hue. It is not exactly true to life, but I think it looks cool.
My aperture was set to F4. That is lower than I would have liked, but it was dark on the mountain and I wanted to get at least some exposure on the snow. That aperture setting was paired with 1250 ISO to get me the amount of light I needed.
The tricky part with the exposure was balancing how much I could push the exposure on the mountain before the light pollution from behind the mountain started to wash out the sky. You can see at the horizon those stars just up and disappear. That is from the city lights doing their thing.
Perhaps the most important decision was the shutter speed. I went with 1/40s. I am not sure how wise that was. If I had to do it all over again, I would have chosen something longer, but I was nervous about creating too much sensor noise.
All told, I took about 165 photos over a period of more than 2 hours. To stitch them all together, I used some freeware called StarStaX. I learned of it from a tutorial by Alyn Wallace.

Was It Worth It?
To be fair, I love photographing Mt. Fuji on any given day, but this was a fantastic experience. It was a great place to get away with the family for a few days and you cannot beat the view when you unzip that tent door and see a serene and peaceful Mt. Fuji reflected in Lake Motosuko.
This is something I would definitely recommend you try if you have some time.